

How to Tell if the Egg Is Fertilized
If you’re diving into the world of hatching chicks, one of the first things you’ll want to know is: Are my eggs fertilized? Whether you’re collecting from your own flock or buying hatching eggs, knowing how to spot a viable egg is key to success.
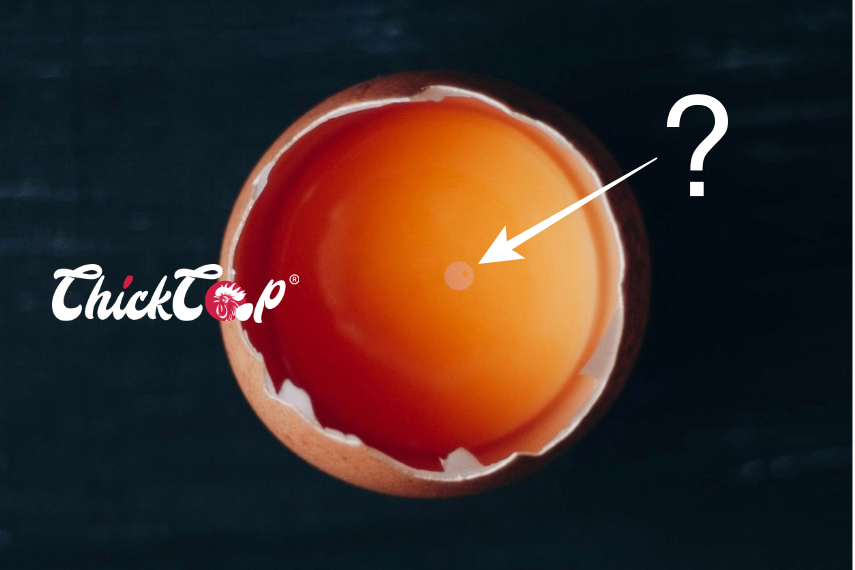
The Blastodisc vs. the Blastoderm
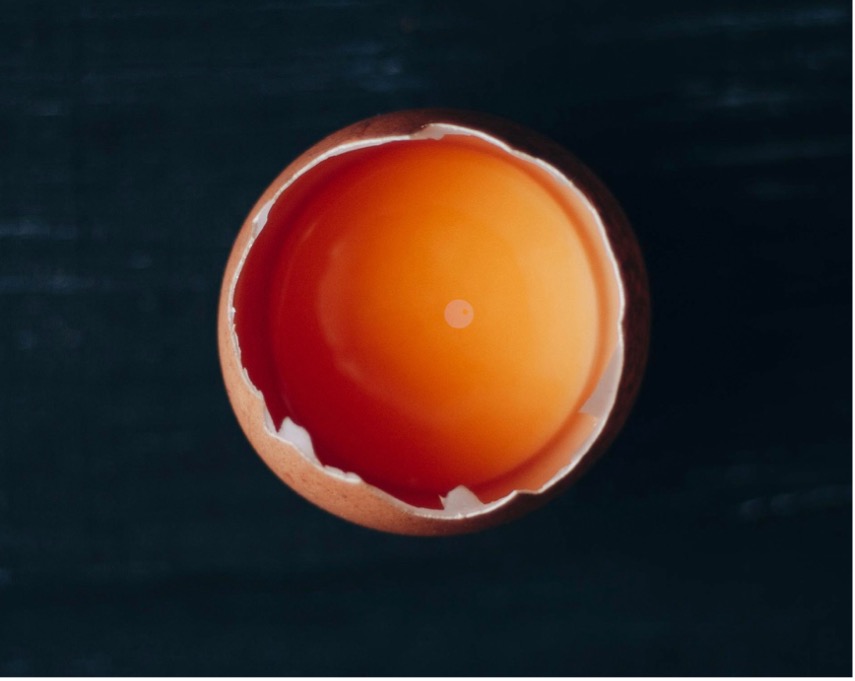
When purchasing a dozen eggs intended for hatching, you can crack one open to check for viability—yes, even before incubation! Look closely at the yolk. If you notice a small white spot, this is the blastodisc. It’s a pale, irregularly shaped cluster of cells that forms when a hen lays an egg.
But here’s the catch:
- Blastodisc = Unfertilized
- Blastoderm = Fertilized
In a fertilized egg, the blastodisc transforms into a blastoderm, which has a bullseye appearance—usually a white ring with a dot in the middle. This means a rooster did his job, and with the right care, this egg has the potential to become a chick.
ChickCoop® Tip : Only sacrifice one egg from your batch to check for fertilization—don’t crack them all! You’re just confirming that at least some are viable.
Before You Incubate: The Must-Do List
Fertilized eggs are just the beginning. Before you set those eggs in the incubator, there are a few things you’ll want to check off your list to give your hatch the best chance of success:
1. Check Egg Freshness
Eggs should be no older than 7–10 days for best hatching success. Store them pointed end down in a cool, clean environment (ideally 55–60°F or 13–16°C).
2. Avoid Washing the Eggs
The natural “bloom” on the eggshell helps protect the embryo from bacteria. Only use eggs that are visibly clean—don’t wash or scrub them.
3. Inspect for Cracks
Hairline cracks, even tiny ones, can let in bacteria and ruin an otherwise viable egg. Always inspect your eggs carefully under bright light.
4. Let Eggs Rest Before Incubation
Allow the eggs to rest at room temperature for at least 12 hours before putting them in the incubator. This helps prevent condensation inside the shell.
5. Pre-Warm the Incubator
Run your incubator for 24 hours before setting your eggs. Make sure it holds a steady 99.5°F (37.5°C) with a humidity level of around 50–55% for the first 18 days.
Starting with fertilized eggs is crucial—but what you do before incubation can make or break your hatch rate. Stay tuned for our next guide on how to candle eggs during incubation!
🐣 Ready to hatch your own flock? Trust the process—and as always, trust ChickCoop® to walk you through it!
At ChickCoop®, we’re more than just a Chicken Company, writing interesting blogs about them– we’re your trusted partner in building a modernized, sustainable and profitable farm. From breed selection to buy-back support, feed guidance, and modern farm management tips, we ensure farmers like you achieve the best results and profits.
Call us today to discuss your farming needs
📧 Email us at: write@chickcoop.in
📞 Call us: +91-9939209699

